 |
 |
 |
 |
 |
 |
 |
|
| Home | Free Comic | Guest Artists | Downloads | Links | Guest Book | Join! |
This page describe the process I used to paint Gwen's portrait, but steps used here can be used to paint any "copy from natural" excercise. The first thing you'll need is a model to paint :) so do a Google Images search or scan a picture from your favorite artist's magazine, even if model doesn't necesarily have to be on digital format: we are about to do a copy, not an instance , remember? :). In my case I choose the photo below in digital format (jpg):

The next step is to open it in Photoshop along with the "New Image" that will become our portrait as shown on the screenshot below. Then choose Window > Tile so you can have one aside the other:

Now we are ready to start drawing and painting :) so create a new layer on the white background document and name it "Pencil". Choose your favorite linework brush (usually a 2px pressure sensitive brush) and start copying the model's contours until you have a finished linework as you can see below. This is essential to place later the rough color masses ;).

Ok, when you're satisfied with the linework, change the "Pencil" layer transparency from 100% to 50%, we want use this lines as boundaries to our colors and they are simply a reference. To avoid modifying 2 hours of hard linework by mistake, it'd be wise to lock it ;). Now we need a layer to place roughly the colors, so create a new layer and name it "Base Colors". Here I must do a parenthesis: The photo is black and white, so you need to "translate" the grayscale into your chosen skin tonality ( ah you thought it was easy? :) ), which in my case was a light orange ochre. Now start placing the main color spots with a medium size "watercolor" type brush as seen in the picture below:

Well It's starting to get shaped ah? :) Now you have set the lighter and darker areas and the main tones or "key" and thats Great, we can now move on to the next step, which is giving each part a shape but with color/light/shadows instead of a boundary line. To achieve this you'll use basically four "airbrush" brushes sizes: a 5px, a 17px, a 36px and a 50px (but feel free to pick up the ones that better suites you) all with their "flow" set to 60% to have more control in how colors blend between them and a 5px "hardbrush" type (hehehehe) to define the edges. So start gradually shaping/colouring those color masses you've painted on the "Base Color" layer on a new layer named "Shaping" and lock the underlaying layer (this is allways a good habit) untill you get something like the picture below:

Very well !! we are at a good point !! and now we have to refine our painting. So lock the "Shaping" layer and create a last layer named "Details". Here the main goal is to exactly match our subject's face, expression, hair and definitive color degree. The most tricky part is the hair (for me) because you need to gradually decrease the brush size from a "hardbrush" 5px to a 1px brush, and brushes "flow" must be set to 30% so you can blend and mix colors for every single hair strand. This step is the most important and fun to make, so work, watch and rework untill you end up with something like the picture below:

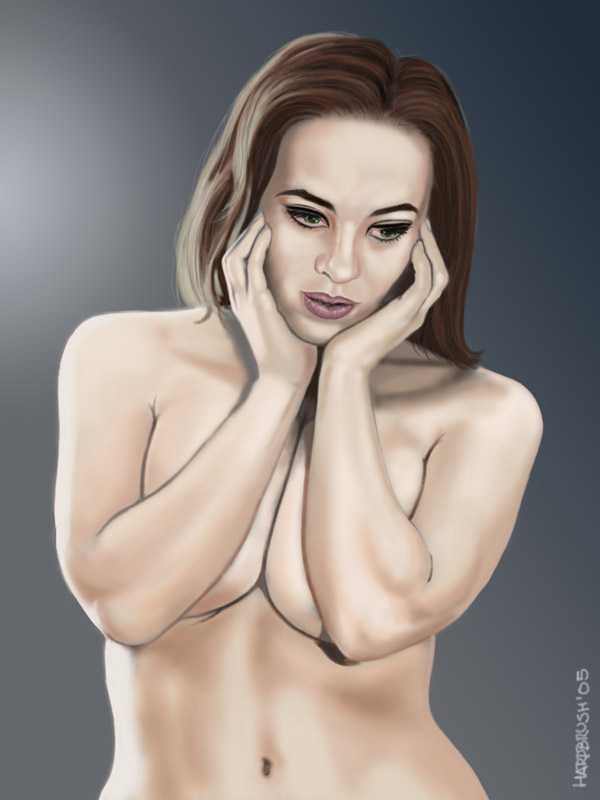
OMG!! we are almost done!! can't believe that I've been on it for almost 16 hours!! There's only one thing left which is very important to the finished look, and that is a background!! :)) This is an easy part, so don't worry. Go to the very first layer (the one at the bottom) and create a new layer named "Background" and fill it up with a color you like and that provides contrast for your painting (opposites work very well for that matter) and then work it a little with gradients, or brush strokes or wathever you might like to avoid it to be too flat. The final result should look like the picture below:

That's it!! Congratulations! you have hand painted your digital portrait!! :)) Now go and pin it up somewhere to share it with art loving folks hehehehe :)
The Artwork and images shown on this page are intellectual property of Hardbrush. Copy or pubblishing without written permission from the author is prohibited.